Virtualization is great way to deal with multiple operation systems on a machine.
In this article, let’s see how to install Kali Linux 1.0.6 in Virtual Box. VirtualBox is an open source general-purpose full virtualizer for x86 hardware, targeted at server, desktop and embedded use.
Kali Linux can be downloaded from here and VirtualBox can be downloaded from here. In this article, I am using latest version 4.3.6 of virtualbox.
Steps:
1. After installing virtualbox, open it. Click on New to create a new virtual machine.
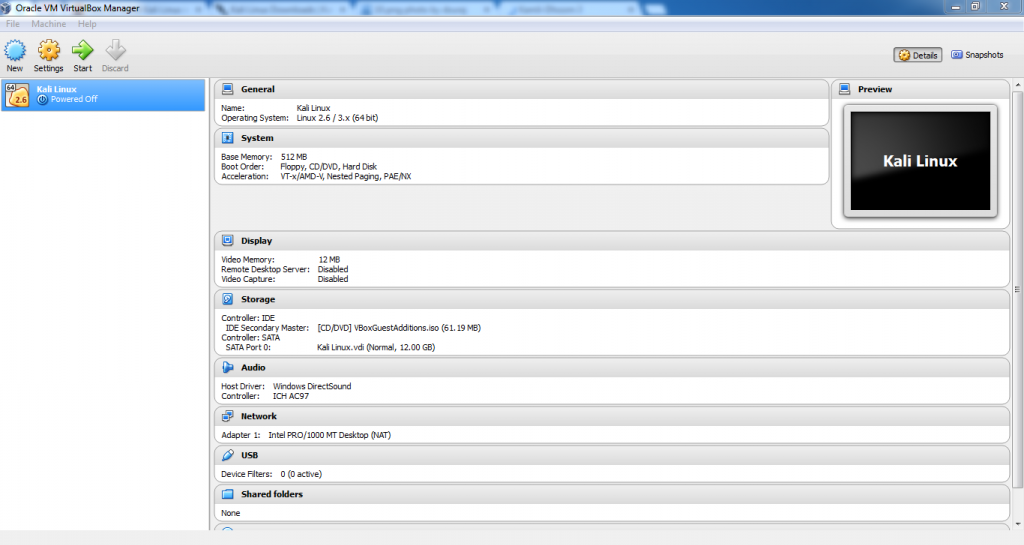
2. Enter the name “Kali Linux”, type and version was auto populated. Change version to Linux 2.6/3.x (64 bit) If you are installing 64 bit version of Kali linux. Click Next.

3. Select the memory size from the screen and click Next. Default is 256 MB.

4. From the next screen, you can either create a new virtual hard drive or use existing virtual drive. Default size is 8 GB, but I recommend to keep it to more than 10 GB. Click create button.

5. Now you need to select a hard drive file type. I recommend to keep it default to VDI. Click next.

6. From the “Storage on physical drive”, keep the default option which is “dynamic allocated” and click next.

7. From the “File location and size” window, set the virtual machine drive size to 12 GB and click create. It will create virtual machine.

Now it’s time to install Kali Linux.

8. From the main screen, right click on the newly created virtual machine “kali linux” and select “Settings..”. Click on System >> Processor and check the Enable PAE/NX setting and click OK as shown in the following screenshot. To know more about PAE and NX click here.

9. Then Select Storage >> Controller : IDE from the settings windows and browse for the ISO file for the Kali linux as shown below. Click OK.

10. From main screen, start your newly created virtual machine “Kali Linux”. Select “Graphical Install” from the following screen to start the installation.

11. Select the appropriate language.

12. Select your location.

13. Select your keyboard layout and click continue.

14. Installation will start loading the additional component.

15. Now enter the hostname for your system. Leave it default to “Kali” and click continue.

16. Enter the domain name, leave it blank if not using any specific domain.

17. By default Kali user is Root, so enter password for it and click continue.

18. Use the entire disk for installation, if you are advance user, you can try other options as well.

19. Select and continue the default virtual hard disk which we have created earlier.

20. If you are new user to Kali linux, select “All files in one partition” option, else you can try other options for advance users.

21. Confirm the virtual hard disk changes and click continue.

22. Confirm the changes, select “Yes” and click continue.

23. Installation will start now, it will take sometime around 5-10 minutes.

24. If you want to check newer versions of the software available then select Yes from “Network mirror” screen, else select No and click continue.

25. System will configure packages.

26. If we want to install grub loader then select Yes else select No option.

27. Once you get the “Installation Complete” screen, click continue.

28. Once it finishes, system will restart. Since the default is the right selection, enter to boot into Kali linux.

29. From the following screen, enter username and password.


30. Since you are into Virtualbox, from the device menu, click on “Install Virtualbox guest additions”, a drive is mounted automatically.

31. Copy the “VBoxLinuxAdditions.run” to the root directory using following command
cp VBoxLinuxAdditions.run /root/32. Change the permissions of the file using command
chmod 755 /root/VBoxLinuxAdditions.run33. Now, Navigate to the /root directory and execute the file using following command
./VBoxLinuxAdditions.run34. After successfully installation reboot the system.
Hope this helps. For any queries / doubts, please comment below.


0 comments:
Post a Comment