WHAT'S NEW?
Loading...
Showing posts with label Wireless Attack. Show all posts

Today, we commonly find wireless networks around us. Most wireless networks are encrypted using WEP or WPA encryption methods. In a previous post  dictionary attack on WPA networks. In this post, I'll cover WEP which has weak mechanism, thus easy to crack, compared to WPA and WPA2.

Theory

WEP, short for wired equivalent privacy, is one of several encryption schemes used to secure wireless networks. At the time of conception, WEP was believed to be secure. However, a security flaw was found in the IV headers of data packets that makes it possible to crack WEP if enough IV headers are collected. The attacks shown in this tutorial take advantage of this weakness in the initialization vectors of wireless packets to crack WEP.
When enough packets have been collected, the key for the WEP-secured network can be cracked by using wifi-hacking tools, such as aircrack-ng. Kali Linux includes aircrack-ng among one of its top 10 security tools for testing vulnerability of computer networks. In this post, I'll demonstrate how a WEP key can be easily found using the aircrack-ng tools in Kali Linux. However, a problem may arise when there are multiple keys in use instead of just one.

What You Need To Follow The Steps In This Tutorial

You need Kali Linux and basic knowledge of Linux. Kali Linux is a Debian-based Linux distribution for testing network security. Kali Linux currently supports PC's and ARM-powered machines. If you use a PC, download the Kali Linux ISO and burn it to a black DVD with InfraRecorder or another tool.
Then, boot your computer with the Kali Linux DVD. Hopefully, you'll be automatically presented with a nice and dark GUI screen of GNOME desktop. For information on running Kali on ARM hardware, see this page.
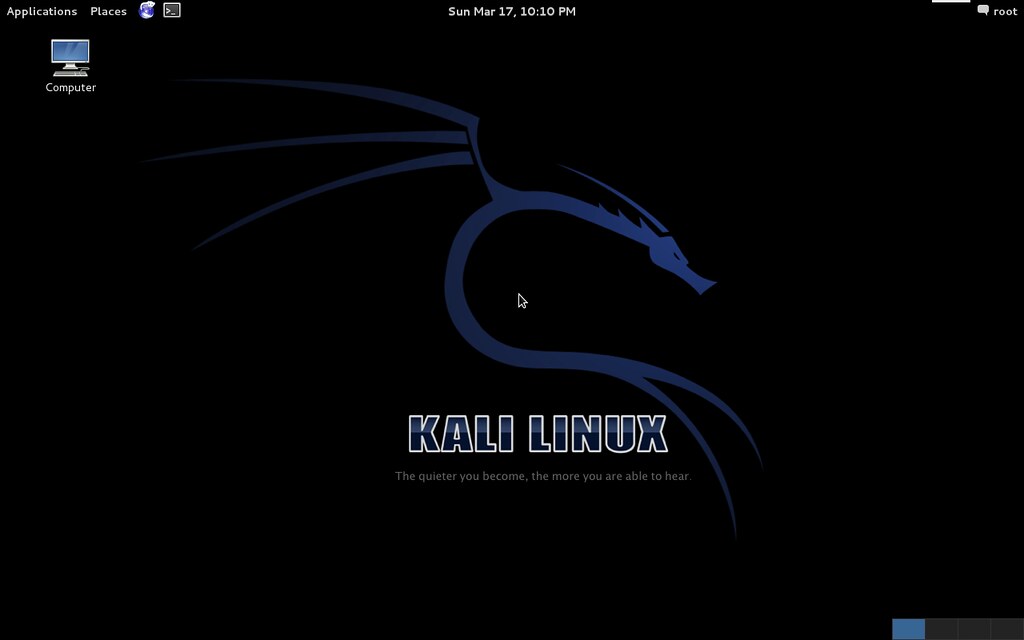
Kali Linux GNOME desktop

Let's Crack WEP

  1. Open the GNOME Terminal (the square icon with >_) and type the command for loading a driver for your wireless network card or USB WiFi adapter. You may have to put required firmware in /lib/firmware before trying to load the driver because Kali Linux lacks firmware for some drivers. For example, to load b43 driver, type:
    modprobe -r b43
    modprobe b43
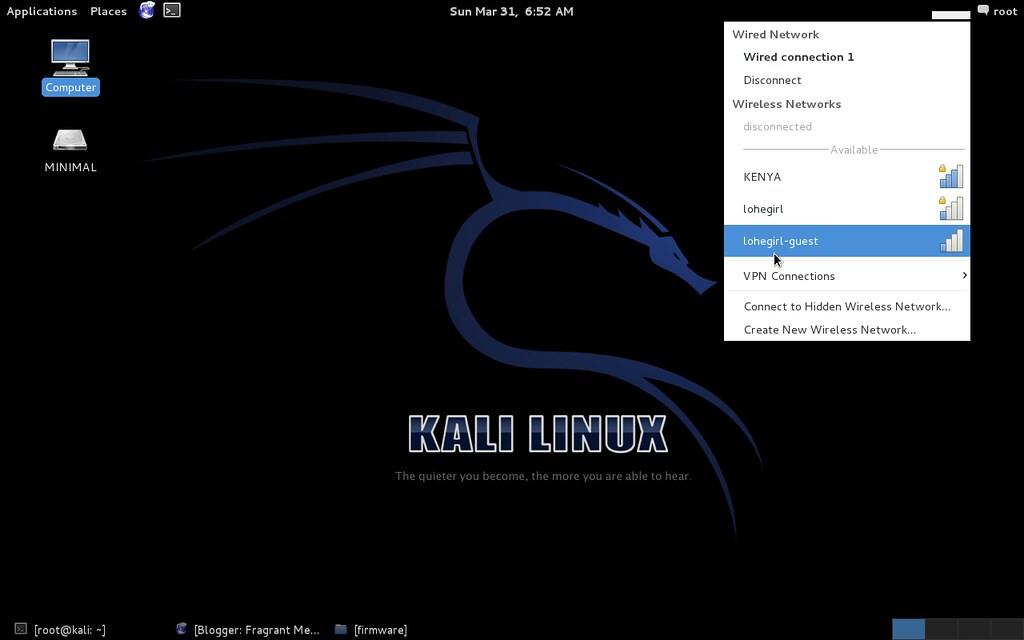
    If the WiFi driver is working, then the network traffic in the top right corner of the screen will show available wireless networks when you click on it.
    network traffic status applet for GNOME
  2. Use kismet to find information about the WEP-secured wireless network that you want to crack. This post shows you how. You need such information as:
    • Name of the wireless network (ESSID)
    • MAC address of the access point (BSSID)
    • Channel of the wireless network
    • MAC address of wireless clients
    Kismet in Kali Linux
    In Kismet, WEP-secured networks are marked with W under the C column of network list.
  3. Type the following commands to put your wireless device wlan0 in monitoring mode.
    airmon-ng stop wlan0
    airmon-ng start wlan0
  4. Change the MAC address of your wireless network card. This may or may not work depending on the hardware used. In the example, the text in red is the new MAC address for your wireless card. Usually, this MAC is the actual MAC address of an existing wireless client associated with the target network. With the fake MAC, we're going to trick the access point with one of the following attacks.
    ifconfig wlan0 down
    ifconfig wlan0 hw ether 6C:83:36:6C:65:CD
    ifconfig -a
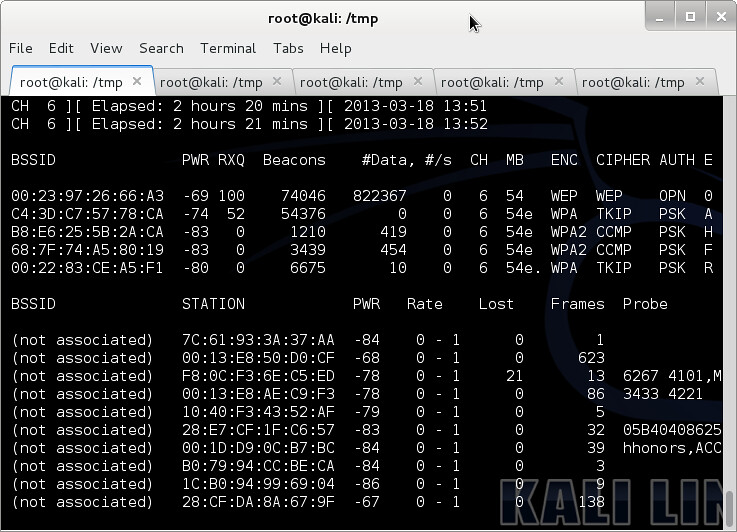
  5. Start airodump-ng which will sniff wireless traffic of the target network and collect good IV's (initialization vectors, part of WEP encryption data). The logfile will be used later to find the WEP key. The number after -c option is the channel of the wireless network to listen to. The screen will show wireless networks and associated clients, if any, with a set of numbers increasing. Don't stop airodump-ng or close the terminal yet. Just leave the terminal open.
    airodump-ng -w logfile -c 6 --ivs wlan0
    airodump-ng in Kali Linux
  6. In the following attacks, we are going to use aireplay-ng. Aireplay-ng is a handy tool for generating more wireless traffic in order to collect sufficient amount of good IV's. It does so by injecting or replaying captured packets to fool the access point into giving us what we need. Open another tab in GNOME Terminal. This attack will associate the target wireless client with the access point.
    aireplay-ng -1 30 -e WIFINET -a 00:23:97:26:66:A3 -h 6C:83:36:6C:65:CD wlan0
    The -e option specifies the network name, the -a option specifies the MAC address of the AP, and the -h option specifies the MAC address of the wireless client. You can use macchanger to view and change your MAC address, for example, macchanger -s wlan0. Then, you can associate your wireless adapter when there are no clients connected to the wireless network in the first place.
  7. ARP injection is slow but always works. While airodump-ng is listening, open another tab in GNOME Terminal and start the ARP injection attack.
    aireplay-ng -3 -b 00:23:97:26:66:A3 -h 6C:83:36:6C:65:CD wlan0
    The -b option specifies the MAC address of the AP and -h specifies MAC address of the associated client. Let it run and airodump-ng will pick up traffic. If no client is connected, we can create one by fake authentication described above.
  8. This attack generates traffic by asking the access point to resend data packets. Open another tab in GNOME Terminal and start the interactive packet replay attack.
    aireplay-ng -2 -b 00:23:97:26:66:A3 -h 6C:83:36:6C:65:CD -n 160 -p 0841 -c FF:FF:FF:FF:FF:FF wlan0
    The -b option specifies the MAC address of the AP and -h specifies MAC address of the associated client.
  9. After enough packets have been collected and saved, aircrack-ng can be used to crack the WEP key.
    aircrack-ng -a 1 -b 00:23:97:26:66:A3 -n 64 logfile-01.ivs
    Replace the filename with your log file that was previously generated with airodump-ng. Also, specify the access point's MAC address with -b option. The -n option specifies whether the WEP strength is 64-bit or 128-bit. The -a 1 option specifies that we're cracking WEP.
    If you still can't crack WEP with tons of IV's, increase the fudge factor with -f N option (N>=2). It'll take much longer to crack but you'll have a better chance at success.
MDK3 stands for Murder Death Kill 3. And it’s a tool that definitely lives up to its name. Because it’s designed specifically for WLAN environments, MDK3 does a marvelous job at crushing wireless network access by sending floods of traffic all at once. The flood of traffic prevents others from being able to connect.
Imagine you are a CEO of a small business. You’re traveling for work, and connected to the hotel’s WiFi connection. It’s vital that you get some information send out tonight. But what happens when your competitor is sitting in the room next door, and he’s slamming your laptop with mdk3 packets? You won’t be able to get anything done, that’s what. You may lose important contracts as a result. Your business may suffer. So now you see just how dangerous denial of service attacks can be. They don’t destroy data or steal it, but they are perfect tools for reputation assassination.

Getting Started with MDK3 – DoS WiFi Hacking

As a prerequisite, make sure your wireless adapter is in packet injecting mode, otherwise this won’t work right at all. To put the wifi adapter into packet injecting mode, look at the link above or use the syntax below to get an idea:
airmon-ng start <wireless interface>


Let’s test our wireless AP, named “WiFi hacking” against wireless DoS attacks. MDK3 is installed by default in the latest versions of Back Track and Kali Linux. To access the tool from Back Track 5 R3, go to Applications -> Back Track -> Stress Testing -> WLAN Stress Testing. 
Select MDK3 from the list. To access it from Kali Linux, MDK3 should launch with the help menu already printed on the screen. Be sure to go through the list of test modes one by one. Don’t be a shitty security professional, be a damn good one. KNOW how this stuff works. Because while MDK3 is an awesome proof-of-concept tool, it does not have a man page and the help options are somewhat limited. You’re pretty much on your own with this tool. But embrace it and learn this tool the old fashioned way, by trial and error. More verbose help is available by running:
mdk3 –fullhelp

 SSID Flooding with MDK3

One neat trick that MDK3 can do is SSID flooding, or beacon flooding. What this means is that MDK3 can broadcast hundreds or even thousands of fake access points. Others that are in the area will see all of these fake access points when they go to search for WiFi access points to connect to. As you can probably see, SSID flooding is not denial of service. However, this is still a pretty cool trick. Potentially, you could set up a dedicated computer with a wireless access point and have MDK3 running in SSID flooding mode at all times. You could, in effect, hide your legitimate wireless access point in a sea of fake access points. A sort of security through obscurity to prevent WiFi hacking attacks.
Here is the syntax to enable simple SSID flooding (MDK3 will generate random fake access point names:
mdk3 <interface> b -c 1
Just replace <interface> with the name of your wireless interface. Remember, usually it’s mon0.
The b option tells MDK3 to use beacon/SSID flooding mode.
-c1  tells MDK3 to broadcast all the fake access points on channel 1. (To better hide the fact these are all fake access points, you can try running multiple instances of MDK3 and specify a different channel each time.
You can also specify a list of specific SSID names from a file by appending the command above with:
-f <file name>
Let’s say your business’s wireless AP broadcasts as “ACME Business”. You want to use MDK3′s SSID flooding mode to hide your access point amongst a bunch of similarly named but decoy access points. You could create a text file named “SSIDs” and fill with fake access point names, perhaps names like “ACME WiFi” “ACME Network” “WiFi ACME”. Then, to bring this all together, you can simply run:
mdk3 <interface> b -c 1 -f SSIDs
There are tons of possible options for the SSID flooding mode:
b – Beacon Flood Mode
This spoofs tons of SSIDs. Remember, security through obscurity
OPTIONS:
-n <ssid>
Use a specific SSID <ssid> instead of randomly generated ones
-f <filename>
Read SSIDs from a file
-v <filename>
Read MAC addresses and SSIDs from a file.
-d
Display Ad-Hoc APs
-w
Set WEP bit (Generates encrypted networks)
-g
Display APs as 54 Mbit
-t
Display APs using WPA TKIP encryption
-a
Display APs using WPA AES encryption
-m
Use valid accesspoint MAC from OUI database
-h
Hop to the channel where the AP is spoofed
-c <chan>
Fake an AP on a channel <chan>.
-s <pps>
Set the DoS speed in packets per second (the default: 50)

Authentication Flooding with MDK3

Moving on to MDK3′s actual DOS options, you will first look at authentication flooding, then conclude with deauthentication flooding. The idea behind authentication flooding is simple. Too many authentication requests at one time may cause the wireless access point to freeze up and perhaps stop working entirely (until someone reboots the thing, that is).
I will warn you that in my experience, authentication flooding doesn’t always work. Most wireless access points are robust enough to handle an authentication flood from one instance of MDK3. (However, if you had multiple laptops running authentication floods this may work.)
Deauthentication flooding works MUCH better (that’s why I am saving it for last) and it doesn’t require the resources that authentication flooding does.  So let’s look at authentication flooding. A simple command to do authentication flooding is:
mdk3 <interface> a -a <ap_mac address>
All you need is the AP’s MAC address as you can see above.
The list of all possible options are below:
a – Authentication DoS mode
Send authentication frames to all APs found in range. By flooding the target AP with authentication requests, we can try to knock it offline.
OPTIONS:
-a <ap_mac address>
You need the access point’s MAC address, which can be obtained with airodump
-m
Use a valid client MAC from OUI database
-c
Don’t check that the test was successful, just run the attack
-i <ap_mac>
Performs an intelligent test on the access point (-a and -c will be ignored). This test connects clients to the AP and reinjects sniffed data to keep them alive
-s <pps>
Sets the speed in packets per second (Default: unlimited)

Deauthentication Flooding with MDK3

The DoS WiFi hacking technique that works best uses deauthenticate requests rather than faking authentication requests.
mdk3 <interface> d -b blacklist_file
Again, the only thing you need is the target access point’s MAC address. Save that MAC address in a text file and specify it after the -b option. This will sent deauth packets to any and all clients connected to the access point specified in the file. (You can add more MAC addresses to deauth if you are evaluating multiple APs in range.
d – Deauthentication / Disassociation Amok Mode
Kicks everybody found from AP
OPTIONS:
-w <filename>
Read file containing MAC addresses to ignore (Whitelist mode)
-b <filename>
Read from a file containing MAC addresses to attack (Blacklist Mode)
-s <pps>
Set the speed in packets per second (Default: unlimited)
-c [chan,chan,chan,...]
Enables channel hopping. Without providing any channels, mdk3 will hop all channels until it finds the target you specified
So there you have it. Multiple ways to perform DoS WiFi hacking attacks using the MDK3 utility. Good luck in your penetration testing and network security careers!

If you enjoyed this, please share it with others
Aircrack NGUI

Introduction To Aircrack NGUI

What Is It ?

Aircrack-NGUI is a combination of the words “Aircrack-NG” and “GUI”. In short, it’s a program written in Java that provides a graphical interface to many hacking tools available for the GNU/Linux operating system. At the core of these tools lie the Aircrack-NG suite (airodump-ng, aircrack-ng, aireplay-ng, etc.), Nmap or Network Map, and the Dsniff suite (arpspoof, dsniff, mailsnarf, urlsnarf, etc.)
Aircrack-NGUI was designed for people who either aren’t very skilled when it comes to using the terminal or those who don’t type very fast but still want to hack quickly. The developer of Aircrack-NGUI also has plans for it to be a learning and scripting tool, so that you can perform your hacking in the program but then save the program calls and arguments it uses to a text file for you to review and learn from or convert to a script.

Tools Needed:

  • Distribution Of Linux (Ubuntu, Kali etc)
  • Aircrack NGUI Found Here

Why Should You Use Aircrack NGUI?:

Aircrack-NGUI provides many benefits to hackers, not just from its graphical nature. It allows you to save commonly used “profiles” in the program so you can save configurations and pull them up quickly. For example, on the Discover Networks screen, you can have a profile for capturing WEP network information.
Whenever you need to capture, you can select the profile instead of remembering all of the arguments that you need to set. Also, NGUI is really proficient at sending information from screen to screen. If you want to de-authenticate client computers on a network using airodump-ng (find the network) and aireplay-ng (attack the network), you can use the Discover Networks screen to find the network, right-click the network in question, and click “De-authenticate” and it will load a Replay/Inject Packets screen with the right information populated.
So it’s select, right-click, attack, GO. The need for copying and pasting has been minimized as much as possible within the program. Finally, you get the comfort of a graphical interface behind you. Many hackers enjoy the terminal because it lets them choose exactly what they want and is customizable. The problem is that many non-hackers will view the terminal (black box, white text) as hacking and might report you just for having that magical box open. Not many users question a GUI, no matter if they know what it does or not.

How do I use Aircrack-NGUI ?

In order to use Aircrack-NGUI, you must first be running a Linux-based operating system. This includes (but is not limited to) Ubuntu (and all of its varients), Fedora, BackTrack 5, and Kali. (Note: Compatibility with Kali has not been tested yet. Try with caution.) It doesn’t matter if you’re running it on your hard disk or from a LiveCD. Once you have your Linux system loaded, go to the link above and click on the Downloads tab. Download the first zip file in the list and extract it to one of your folders. Open up a terminal and change into the directory with the extracted files. From there, type:

In Ubuntu:
sudo java -jar AircrackNGUI.jar

In Fedora:
su -c ‘java -jar AircrackNGUI.jar’

In BackTrack 5/Kali:
java -jar AircrackNGUI.jar

You will need the Java Runtime Environment (JRE) installed in order to run the software. From there, the program will launch and display the following :

This is the main window of Aircrack-NGUI. The menus at the top allow you to select which tool you want to use. A list of your registered network devices will appear on the left-side of the screen. If you select a device, its information will appear on the right. If you click on a setting title, it will prompt you to change it. You can also copy the values to your clipboard using the Copy To Clipboard dropdown.
You can save your configuration settings to a file using the “Save to Config…” button. Finally, to create a virtual monitor mode interface click “Create Monitor Interface” (requires aircrack-ng installed and configured!). To destroy a monitor-mode interface, click “Destroy Monitor Interface”.
(Shown Below)


NGUI2


From this point, you have the program setup and hardware configured for some wireless destruction! Here’s a breakdown of your different options:
  • Discover->Discover Networks: Combines airodump-ng and wash to find wireless networks and which ones are vulnerable for WPS pin guessing (used alongside Reaver).
  • Discover->Discover Hosts: Allows you to scan a network or a specific IP for open ports and networking information.
  • Discover->Graph Network: Create a graphical representation of a network using airgraph-ng.
  • Discover->WPA Dictionary: Create a dictionary to speed up the cracking of WPA handshakes
Greyed-out menu options mean that you don’t have the appropriate programs installed to use the feature, or the feature hasn’t been developed yet (most of these are under the Other Tools dropdown). If you have a program installed but it’s greyed out, use the Settings page (Setup->Settings)
.


clip_image002


If you’re using BackTrack 5, click the “Default BT5 Settings” button and the settings will auto-populate to match that configuration. If you’re on another system, you’ll need to set the settings yourself. If you added the program to your path variable leave it at “IN PATH”. If it’s in a specific directory, change it to “DIRECTORY” and a textbox will appear for you to provide the path. Once you have your settings configured, click “Save”.
Click on Setup->Network Devices to configure your hardware for hacking.
  • Attack->Replay/Inject Packets: Send packets to routers to force them to spill the goods!
  • Attack->Crack WEP/WPA Key: Take captured network information to find the password to a network
  • Attack->Forge Packets: Create new packets from packets captured
  • Attack->ARP Poison Routing: Perform a man-in-the-middle attack with ease using arpspoof
  • Attack->Sniff Passwords: Sniff passwords from a victim machine from a man-in-the-middle attack.
And that’s just the beginning! There are more tools available under the Other Tools dropdown and in context menus of the above listed features.

Conclusion:

Aircrack-NGUI is a great tool for those who need an inconspicuous, fast tool with lots of room for learning and improvement. Not to mention, it’s free to use and re-distribute! If you have a recommendation for the writer, feel free to create an Issue on his Bitbucket repository page.
Thanks for reading, don’t be evil!

Nmap 6.40 released: How to install and some examples using scripts

As you know Nmap is a free security scanner. It is an open source project and it can be installed in the majority of the operating systems like Redhat Linux, Microsoft Windows, UNIX, FreeBSD, etc...
Some days ago, Fyodor published here that a new Nmap version has been released. The most important changes of Nmap 6.40 since 6.25 are:

  • Added 91 new fingerprints bringing the new to 4.118.
  • Their signatures have been increased from 273 to 8.979.
  • The tool stills detect 897 popular protocols like http, ssh, smpt, snmp, imap, pop3 or another not too popular like gopher-proxy, airdroid, enemyterritory...
  • Some IPv6 OS fingerprints added.
  • [Nsock] Added initial proxy support to Nsock.
  • Added 14 NSE scripts with a total 446.
  • Now we have the option to mix IPv4 range notation with CIDR netmasks. For example 192.168-1.4-100,200.7/24
  • Timeout script-args are now standardized to use the timespec (30s, 900ms, 20h, etc.)
  • [Ncat] Added --lua-exec. This feature allows us to run Lua scripts with Ncat.
  • ...
In my opinion, Nmap is the best network security scanner. Their scripts are really useful and it's a great news to hear about they have released 14 new ones. 
These are the last scripts released:
  • hostmap-ip2hosts
  • http-adobe-coldfusion-apsa1301
  • http-coldfusion-subzero
  • http-comments-displayer
  • http-fileupload-exploiter
  • http-phpmyadmin-dir-traversal
  • http-stored-xss
  • http-vuln-cve2013-0156
  • ike-version
  • murmur-version
  • mysql-enum
  • teamspeak2-version
  • ventrilo-info

You can install this version with the commands below:
1
2
3
4
5
6
wget http://nmap.org/dist/nmap-6.40.tar.bz2
bzip2 -cd nmap-6.40.tar.bz2 | tar xvf -
cd nmap-6.40
./configure
make
sudo make install

You can check out if you are running the last version with this command:
1
2
3
4
5
6
jnieto@behindthefirewalls.com:~/nmap-6.40/scripts$ nmap -V
Nmap version 6.40 ( http://nmap.org )
Platform: x86_64-unknown-linux-gnu
Compiled with: nmap-liblua-5.2.2 openssl-1.0.1c libpcre-8.31 nmap-libpcap-1.2.1 nmap-libdnet-1.12 ipv6
Compiled without:
Available nsock engines: epoll poll select

Now, I'm going to show you some examples in order to work with some interesting scripts.

The hostmap-ip2hosts.nse script is really useful. We can get all domain names behind the same IP.
1
nmap --script hostmap-ip2hosts.nse -sn -Pn behindthefirewalls.com


With the hostmap-robtex we can get the same information we got before but now using Robtex.com. I talked about this website in the post: Finding All Websites Hosted Behind same IP
1
nmap --script=hostmap-robtex.nse -sn -Pn linkedin.com


With the command below, you can get all user registered in the majority of the Drupal installations, even the drupal.org site. we can get the Drupal users using the web browser... Thanks to Nmap we can automate this process.

Drupal does not recognize this problem as a vulnerability. They know it is easier to make a brute force login if a hacker knows the users...
1
nmap --script=http-drupal-enum-users drupal.org -p 80,443 -Pn


With the next scripts, we can detect if some organization has installed a Web Application Firewall (WAF) in his infrastructure.
1
nmap --script=http-waf-detect.nse www.toyota.jp -p 80 -Pn


With the whois.nse script, we can get the contact details and the network range of a certain company.
1
nmap --script=whois.nse www.facebook.com -p 80 -Pn


With smb-check-vulns.nse you can check for these vulnerabilities in your private network:
  • MS08-067, a Windows RPC vulnerability.
  • Conficker, an infection by the Conficker worm.
  • Unnamed regsvc DoS, a denial-of-service vulnerability I accidentally found in Windows 2000.
  • SMBv2 exploit (CVE-2009-3103, Microsoft Security Advisory 975497).
  • MS06-025, a Windows Ras RPC service vulnerabilityMS07-029, a Windows Dns Server RPC service vulnerability.
1
sudo nmap -sU -sS --script smb-check-vulns.nse --script-args=unsafe=1 -p U:137,T:139 161.111.80.0/24


Also, Nmap has a lot of scripts in order to detect computers with some weakness in our network. You can try with some of these.

  • afp-path-vuln.nse
  • ftp-vuln-cve2010-4221.nse
  • http-huawei-hg5xx-vuln.nse
  • http-iis-webdav-vuln.nse
  • http-vmware-path-vuln.nse
  • http-vuln-cve2009-3960.nse
  • http-vuln-cve2010-0738.nse
  • http-vuln-cve2010-2861.nse
  • http-vuln-cve2011-3192.nse
  • http-vuln-cve2011-3368.nse
  • http-vuln-cve2012-1823.nse
  • http-vuln-cve2013-0156.nse
  • mysql-vuln-cve2012-2122.nse
  • rdp-vuln-ms12-020.nse
  • rmi-vuln-classloader.nse
  • samba-vuln-cve-2012-1182.nse
  • smb-check-vulns.nse
  • smb-vuln-ms10-054.nse
  • smb-vuln-ms10-061.nse
  • smtp-vuln-cve2010-4344.nse
  • smtp-vuln-cve2011-1720.nse
  • smtp-vuln-cve2011-1764.nse